Getting started
This chapter shows how to start BIMopen on the desktop and in the browser, what the sample project contains, and how to model a first small house: four walls, a door, a window, a floor, a roof, a 3D view and a sheet with the plan on it. It takes about ten minutes.
Running BIMopen on the desktop
BIMopen is built from its source code with Rust, version 1.90 or later. On Linux the graphical interface also needs the development files of xkbcommon, Wayland and GTK 3.
sudo apt-get install -y libxkbcommon-dev libwayland-dev libgtk-3-dev   # Debian, Ubuntu
cargo run --release -p bimopen -- --sample                             # opens the sample house
The program is bimopen. It accepts a file to open and one option:
| Command | What it opens |
|---|---|
bimopen |
A new, empty project |
bimopen --sample |
The sample house |
bimopen house.bimopen |
The project saved in house.bimopen |
You can also open a project by dragging a .bimopen file from the file manager into the window.
Language and theme
The first time, BIMopen speaks the language of the operating system when it is one of its six languages (Italian, English, German, French, Spanish, Arabic), and English otherwise. To change it, use the language menu at the right end of the title bar (the globe with the language's name), or Application menu ▸ Options ▸ Language. The interface changes at once.
In Options you also choose the Theme, Light or Dark, and whether the background of the views is inverted (Invert background color: dark views with light lines). Choosing the dark theme also inverts the background; you can turn it back off. BIMopen remembers the language and the theme for the next time.
Running BIMopen in the browser
The web version is the same program, compiled for the browser. Open atsanna.github.io/bimopen-site/app/: it starts with the sample house. Nothing needs to be installed, and the project stays in your browser: it is not sent anywhere.
The address accepts these options, which can be combined with &:
| Address | Effect |
|---|---|
app/?lang=de |
Opens in German for this visit (it, en, de, fr, es, ar) |
app/?empty |
Starts with a new, empty project instead of the sample |
app/?webgl |
Draws with WebGL2 even where WebGPU is available |
The browser must support WebGPU or WebGL2. In the browser some things work differently:
- Open… cannot show a file dialog: drag a
.bimopenfile into the page to open it; - Save and the exports download the file, with the name of the project.
To build the web version yourself:
cargo xtask web                              # builds dist/web
python3 -m http.server 8080 -d dist/web      # then open http://localhost:8080
cargo xtask web needs the wasm32-unknown-unknown target of Rust and the wasm-bindgen command
of the version written in Cargo.lock; with binaryen's wasm-opt installed, the result is
smaller.
The sample project
The sample house shows most of what BIMopen can do. Open it with Application menu ▸ Sample
project, with bimopen --sample, or by typing sample at the command line.
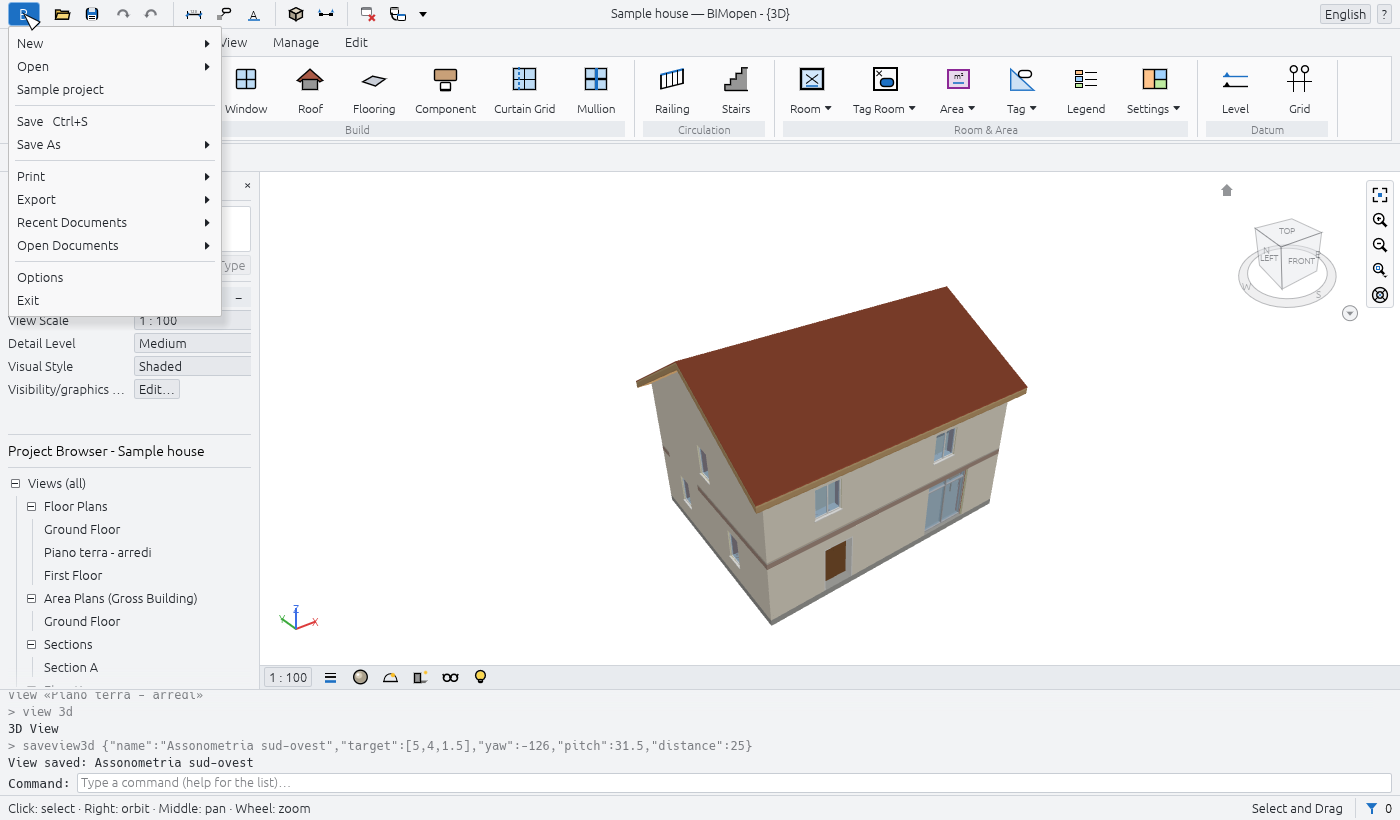
It contains:
- two levels, each with its floor plan, and five grid lines;
- fifteen walls of four types, with layers, joined at the corners;
- six doors and twelve windows, tagged in the plans;
- two floors, a pitched roof, a stair with its railings and a storefront curtain wall;
- furniture and plumbing fixtures, eight rooms coloured by use, with a legend;
- a section, an elevation, an area plan, a saved 3D view and a drafting view with a wall detail;
- dimensions, text notes and the schedules of walls, doors, windows, rooms and materials.
Tip
The sample is a good place to try a tool before using it on your own project: a new sample is always one click away, and nothing you change in it is saved unless you save it.
Your first house
The steps below start from an empty project and end with a sheet. Every step names the button to click; the interface chapter explains each part of the window.
1. Start a new project
- Click the blue B button at the left end of the title bar: the application menu opens.
- Click New ▸ Project…. The New project dialog proposes BIMopen's default template: click OK.
The new project has two levels, Ground Floor and First Floor, a floor plan for each, and the default 3D view. It has no walls yet. Its wall, door, window, floor and roof types are ready to use.
2. Open the ground floor plan
In the Project Browser, under Views (all) ▸ Floor Plans, double-click Ground Floor. The plan opens in the drawing area and the title bar shows Floor Plan: Ground Floor.
Note
A single click on a view in the Project Browser shows its properties in the Properties palette without opening it. A double-click opens it.
3. Draw four walls
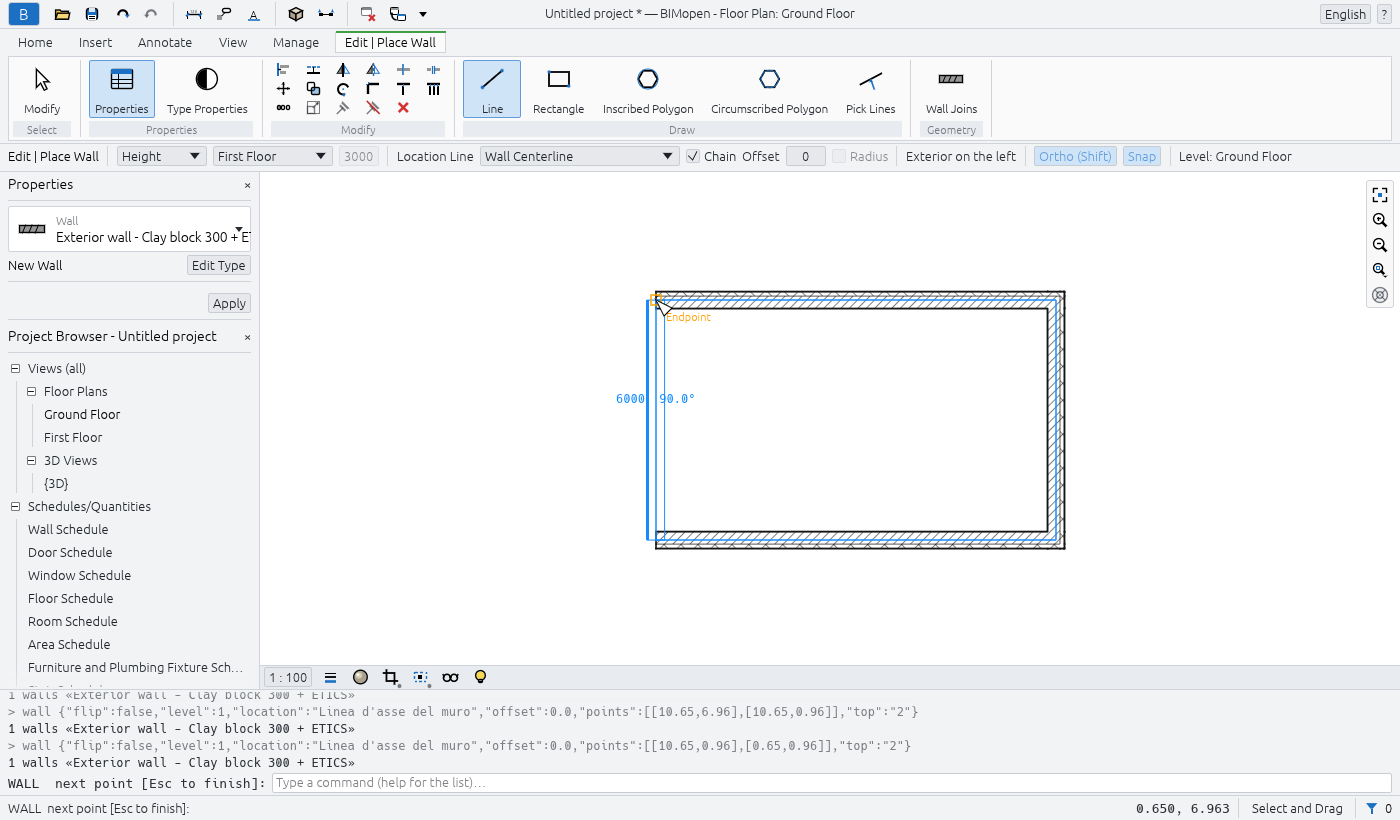
- Click Home ▸ Build ▸ Wall. The ribbon switches to the contextual tab Edit | Place Wall, the options bar shows the settings of the wall, and Properties shows the type of the next wall, Exterior wall - Clay block 300 + ETICS.
- On the options bar, turn on Ortho (Shift): the walls stay horizontal or vertical.
- Click in the plan where the first corner goes. The command line asks for the next point:
WALL next point [Esc to finish]:. - Click the second, third and fourth corners. While you move the mouse, the length and the angle of the wall being drawn are shown next to it.
- Click the first corner again: the four walls are joined at the corners.
- Press Esc to stop the chain, and Esc again to end the tool.
Tip
You can draw the same walls by typing their corners in metres:
wall 0,0 10,0 10,6 0,6 c. The final c closes the chain. See
Command line and MCP.
4. Add a door and a window
- Click Home ▸ Build ▸ Door, then click on a wall where the door goes. The door is placed in
the wall, which is cut around it. The command line confirms it:
Door «Single swing door 80x210» in wall …. - Press Esc: the tool ends and the ribbon returns to the Home tab.
- Click Home ▸ Build ▸ Window, click on another wall, and press Esc.
A door or a window can only be placed in a wall: after a click away from the walls, the command
line answers no wall at that point and nothing is placed.
5. Add a floor and a roof
- Click Home ▸ Build ▸ Flooring. Sketch mode opens: the contextual tab Edit | Create Floor Boundary, with Pick Walls active.
- Move the cursor over a wall and press Tab: the four walls are highlighted. Click: their lines go on the inner faces of the walls.
- Click Finish Edit Mode: the floor is made and the command line gives its area.
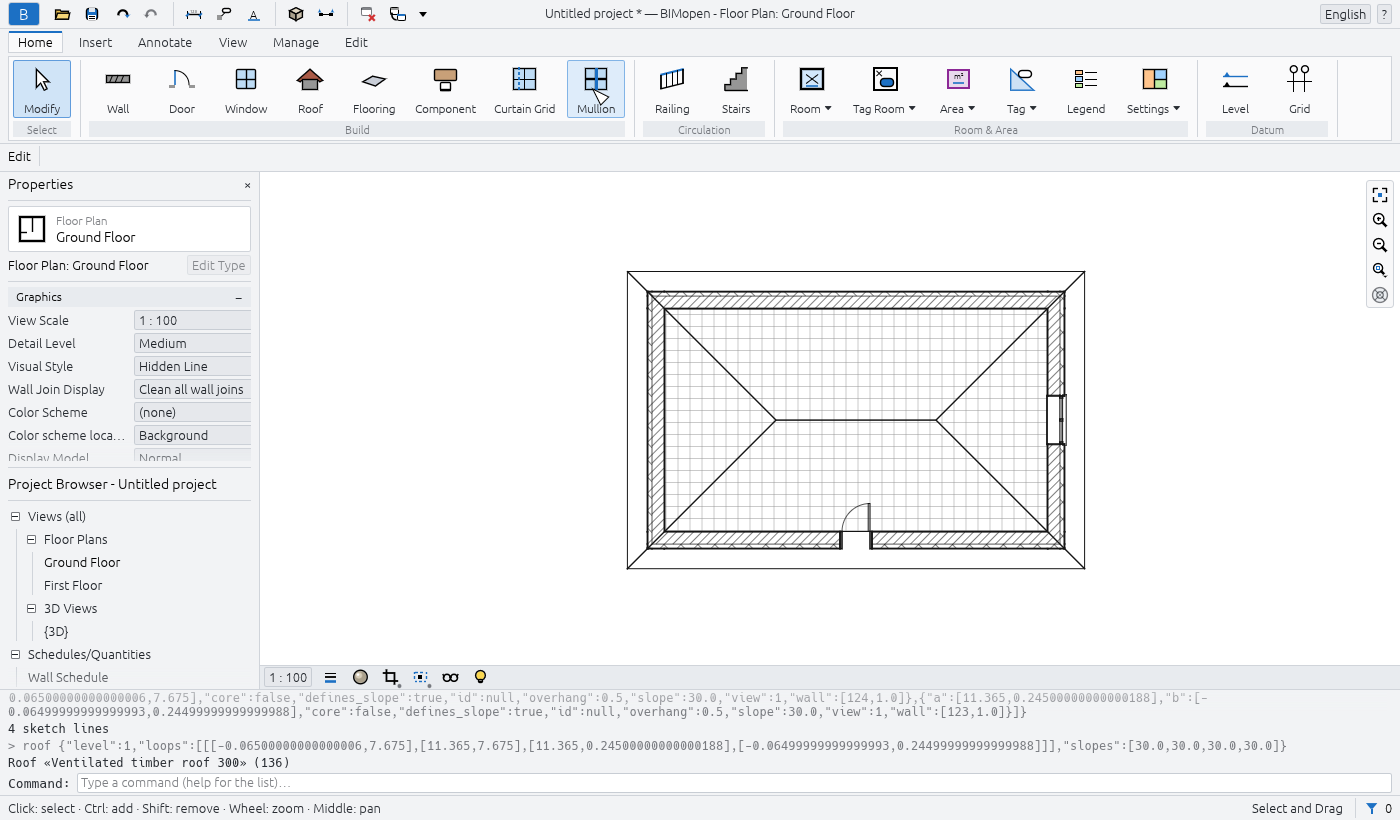
- Click Home ▸ Build ▸ Roof. Pick Walls is active again; the options bar has Defines Slope (ticked) and the Overhang (500 mm by default).
- Press Tab over a wall, click, then Finish Edit Mode: a hip roof sloping at 30° covers the walls, with the overhang all around.
Floors, roofs, stairs and components tells more about sketch mode.
6. Look at it in 3D
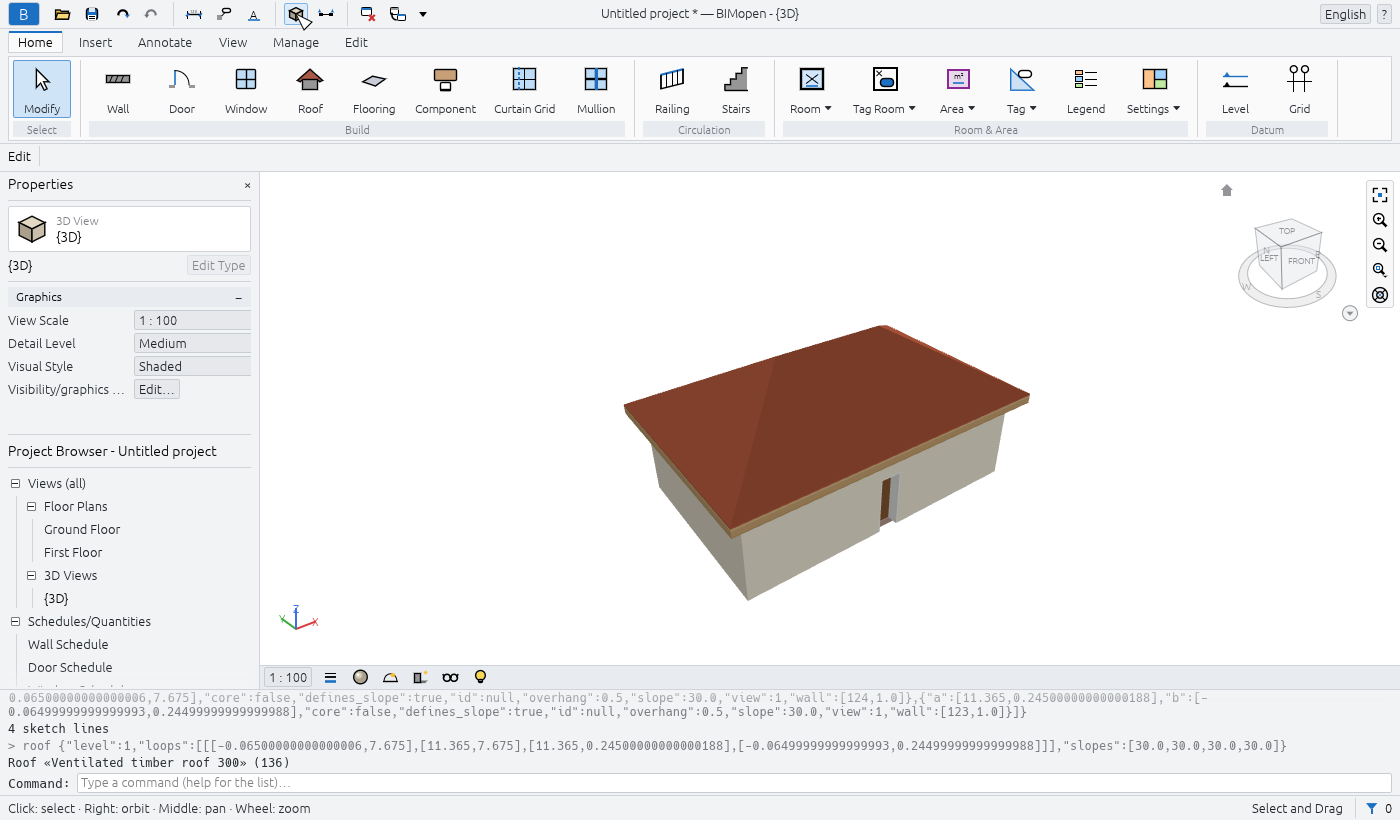
Click the 3D View button (the cube) on the quick access toolbar. The default 3D view, {3D}, opens. Drag with the right mouse button (or with Shift and the middle button) to orbit, drag with the middle button to pan, and turn the wheel to zoom; the left button selects, as in plans. Home fits the whole model in the view.
7. Put the plan on a sheet
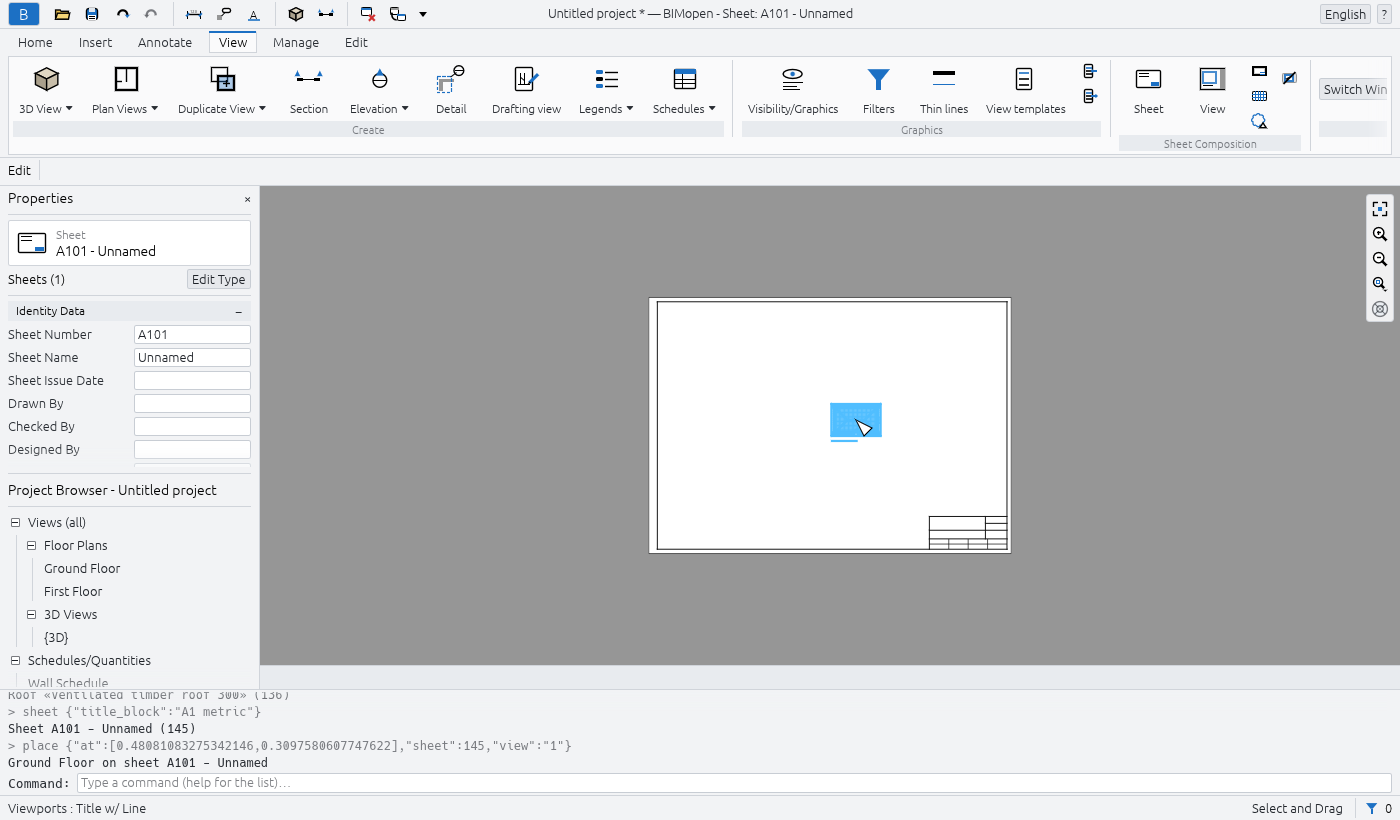
- Click the View tab, then Sheet Composition ▸ Sheet. The New Sheet dialog lists the title blocks: none, A0, A1, A2 or A3, with their size in millimetres.
- Click OK. The sheet is created with the next free number (A101 for the first one, then A102…) and opens.
- Click Sheet Composition ▸ View. The Views dialog lists the views that are not on a sheet yet.
- Choose Floor Plan: Ground Floor and click Add View to Sheet. A rectangle of the plan's size follows the cursor: click on the sheet where the plan goes. It is placed at its own scale, 1 : 100, as a viewport, which stays selected.
8. Undo, redo and save
- Ctrl+Z undoes the last change (here, the viewport goes away); Ctrl+Y redoes it. The arrows of the quick access toolbar do the same.
- Ctrl+S saves the project. A project that has never been saved asks for a file name first;
the file has the extension
.bimopen. In the browser, the file is downloaded.
The title bar shows an asterisk after the project's name while there are unsaved changes: Untitled project *.
What next
- The interface describes every part of the window.
- Keyboard shortcuts lists the keys and the two-letter shortcuts, such as
WAfor a wall. - Command line and MCP shows how to type commands, run scripts and let an agent model for you.